How to Remove and Install Garage Door Weather Seal
SAFETY FIRST! Be very careful around the garage door. Its
one of the heaviest moving objects on your house and can inflict serious or
even deadly injury and harm to people, pets and objects in and around the
garage.
Getting Started
Start by placing all of the necessary
tools
outside of the garage (on the driveway, etc.) because you will
need to close the garage door when you begin the weather seal removal and installation
process.
Recommended Tools Needed:
·
Safety glasses and work gloves
·
Utility knife with a NEW, sharp blade
·
Tape measure
·
Vice Grips and/or locking pliers or clamps
·
Pencil
·
Drill and a 1/16 drill bit
·
New garage door weather seal (available at www.
stardoorparts.com
)
·
Utility Shears or other means to cut the weather
seal
·
Hammer
·
Nails
·
Caulk gun
·
Caulk (we suggest using one that is paintable so
you can match it to the color of your house or garage door)
·
Clean cloth
·
Household spray cleaner (such as 409)
·
An Assistant!
Removal of the Old Weather Seal
1.
Start by closing the garage door and unplugging
the garage door opener from the power source. Also, if your opener is equipped
with an emergency operator trolley release (usually a red T-style pull handle
on a rope connected to the trolley), be sure to pull the release to disengage
the trolley from the track and manually raise the garage door to the open
position.
We have found that it is easier
to work on the weather seal with the garage door in an open position.
To do this hold the garage door where you
desire it to stay and use a locking pliers (Vise Grips) and clamp it to the
garage door track.
Tip: Be sure to position the locking clamp below the bottom roller so that the door cannot close on you if the torsion spring tension happens to be out of adjustment. This is a very common issue and the tension should be adjusted annually only by a trained professional.
2.
To begin removal of the old weather seal, (with
the garage door in an open position), choose a side and take a sharp utility
knife (with a NEW blade) and make a clean score at the joint between the weather
seal body (wood, aluminum, PVC, or vinyl) and the garage door jamb (see photo).
This will allow you to remove the old weather
seal with out damaging the finish on the garage door jamb.

3.
Using a rigid, steel putty knife, firmly push
between the old weather seal and the garage door jamb. With a gentle prying
motion, loosen the weather seal from the door jamb. Now you will be able to use
a flat bar (pry bar) inserted in the gap to finish removing the seal and nails.
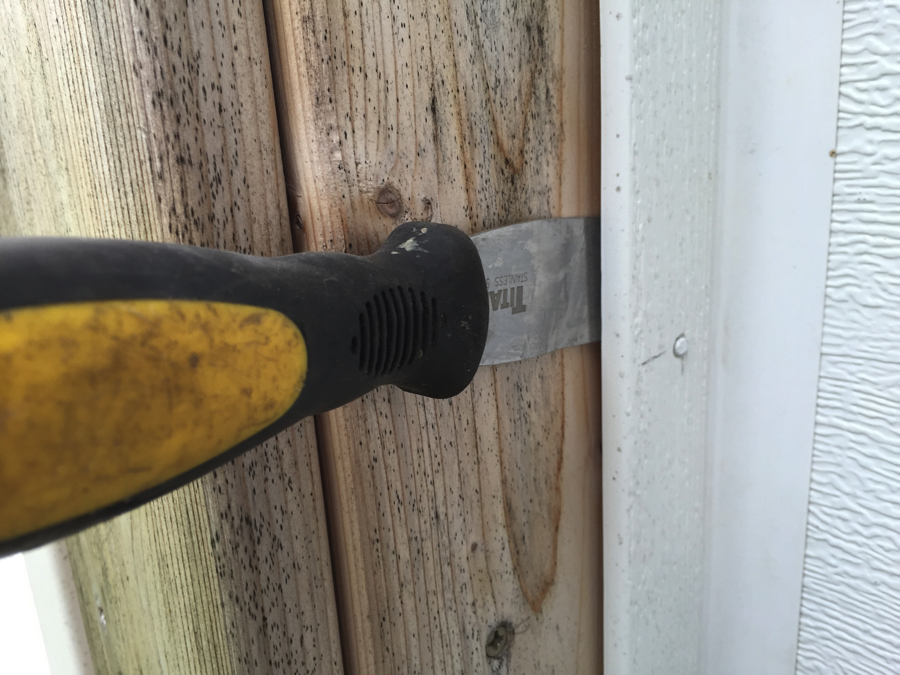
Tip: You may
want to place a small piece of sheet metal or a putty knife under the pry bar
to prevent damaging the finished garage door jamb (see photos).


4.
Repeat this process for the remaining top and
side pieces of weather seal.
5.
With all of the weather seal and fasteners
removed from the garage door jambs, take this opportunity to remove any debris
and ridges of paint.
We also suggest cleaning
the door jambs with a clean cloth and some household spray cleaner (like 409 or
a similar product that cut remove dirt and grease).
Installation of New Weather Seal
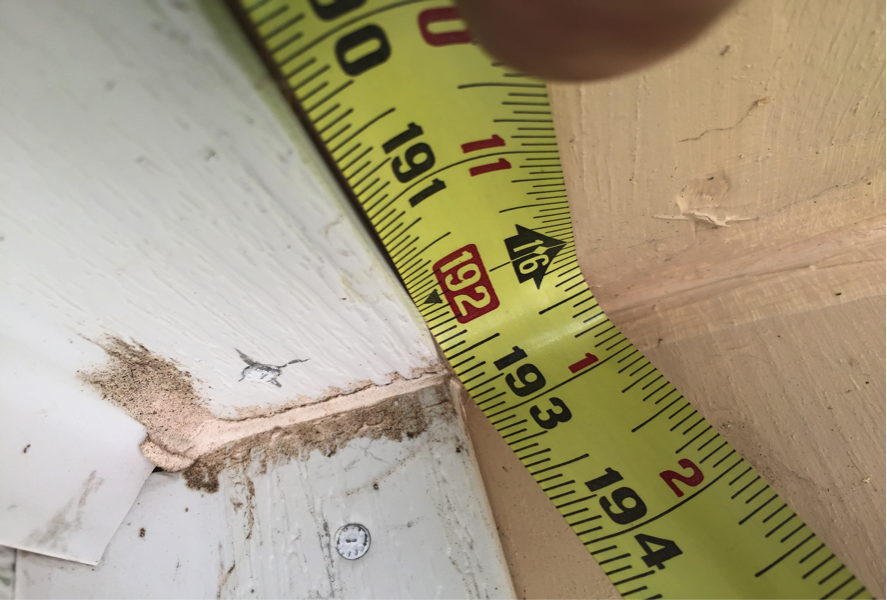
1.
Start by using a tape measure to measure the
length of the inside of the top garage door jamb, side-to-side at the top,
where the top piece of garage door weather seal will be installed first (see
photos).
Tip:This step is done much easier with two
people.
2.Use
a utility shears to cut the new, replacement weather seal pieces to length (be
sure to first check the fit and adjust as needed and re-measure BEFORE cutting!).
Tip:
You can use utility shears, a hand or electric hand saw with a fine
tooth blade (placed in a miter box based on type of saw used), an angle grinder
with a 3/32 cutoff wheel, or a multi-tool with a fine tooth blade or saw.
There are many options to choose from here, just remember to utilize ALL SAFETY
MEASURES regarding eyewear, hearing protection, gloves, etc.
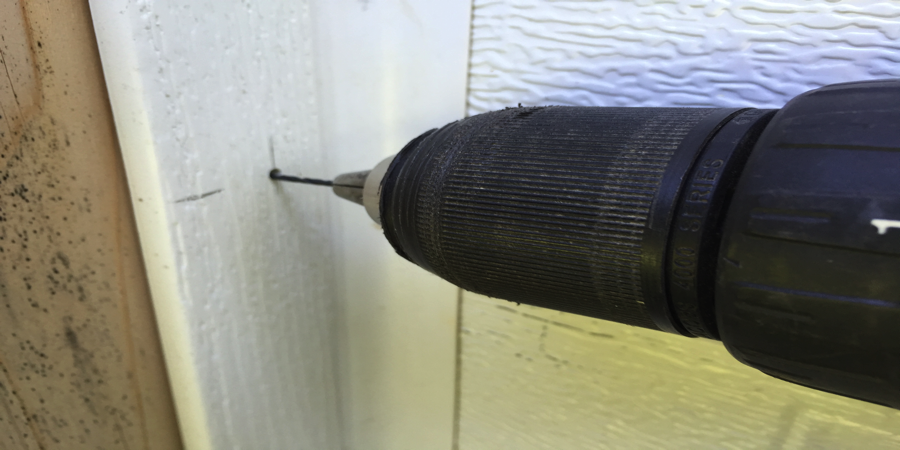
3.After
you have determined the placement of the new, cut weather seal, we recommend
drilling small pilot holes for the nails.
We have found that it is easier to drill a small pilot hole (slightly
smaller than the diameter of the nail you will use) centered in the width of
the new weather seal, 1 inch from each end and then in 8 12 inch intervals
for the entire length of weather seal.
This eliminates the need to try to pound the nails in while in an upside
down position (see photo).
Tip:
If it is colder than 60 degrees F outside we highly recommend that you
take the time to drill small pilot holes especially if you are installing PVC
seal and the main body cracks easily at colder temperatures.
4.
4. Next,
push a nail into each hole in the weather seal. We prefer to use color matched
Maze brand galvanized, smooth or ring shank trim nails, but a stainless steel
or 4D, (about 1-3/8 to 1-1/2 in length) galvanized box nails should work as
well.
Do not use steel nails of
any type as they will rust and leave rust streak on the paint and finishes.

Photo Notes:Nails shown in photo, left to right, are:
Galvanized Brown Maze Ring Shank Nail, Galvanized White Maze Ring Shank Nail
and Stainless Steel Smooth Shank Nail.
The
4D Galvanized Smooth Shank Box Nail is not pictured.
5. With
the door in the closed position, and with the help of your assistant, raise the
weather seal into position, making sure to adjust the lip of the seal so that
it presses against the face of the garage door, forming an air tight seal. The
solid PVC body of the seal should not contact the garage door.
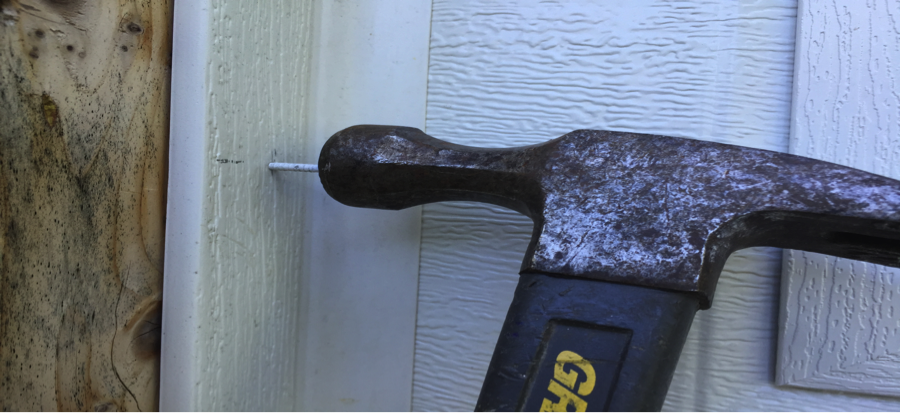
6. Start
all of the nails across the top piece of weather seal into the door jamb, but
do not drive the nails all the way in until you have made your final
adjustments to the weather seal placement (see photo).
7. Repeat
the same process for both of the side door jamb weather seals, adjusting the weather
seal fit as you go.
8. Next
you can trim the soft vinyl flaps at a 45 degree angle in the corners for a
nice, clean-looking finish.
9.Check
the garage door operation to make sure it does not bind on the weather seal at
any point as it travels along the track.
10. Now you can drive the weather seal nails all
the way in, just be careful not to hit the door if you have it closed at this
time.
11. If you had
problems with binding before you replaced the seals, you may find that you will
need to adjust the garage door operator pressure limit settings.
Refer to your garage door operator Owners Manual
or their website for this information.
12. Finally,
for a nice clean appearance and to seal-out the weather elements, we recommend
using a latex, silicone-based but paintable caulk, to seal along the edge of
the weather seal and the door jamb.
Be
sure to use a damp rag to wipe away any excess caulk.
You can then apply touch-up paint as needed.
If you arent
sure what weather seal to buy at
www.
stardoorparts.com
, simply write us at [email protected] and we will
try to help and get what you what need quickly and at our low prices.
Also be sure to check out our other Garage
Door DIY Articles on our website.


